
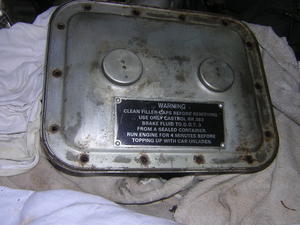
Brake reservoir : remove
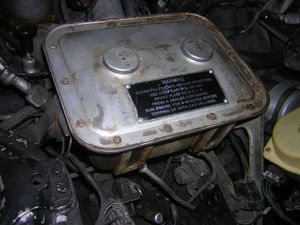
0-Break fluid reservoir

1-Protect fender
Break fluid is corrosive to paint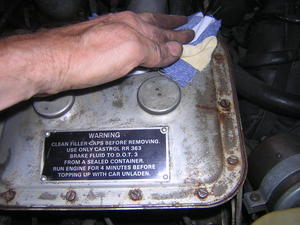
2-Clean the lid
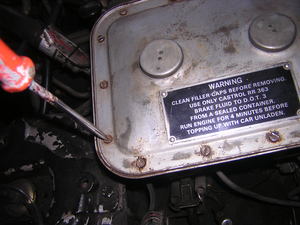
3-Remove all of the 14 set screws securing the lid
Tools: Flat screwdriver
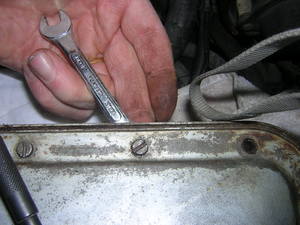
4-The set screws on both short sides are secured with 9mm nuts
Tools: 9mm open spanner
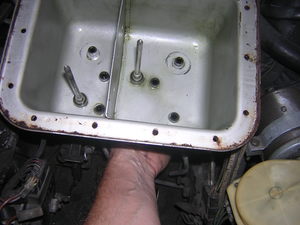
5-Remove lid
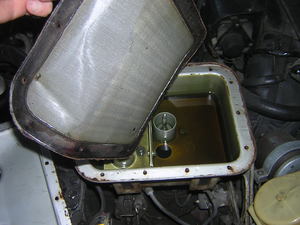
6-Remove gauze filter
7-Liquid color and inner condition are not too bad
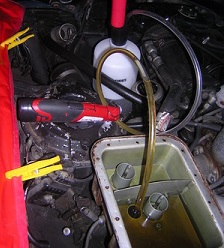
8-Pump out remaining liquid
Tools: Oil syringe
9-Clean / dry the inside of the reseroir

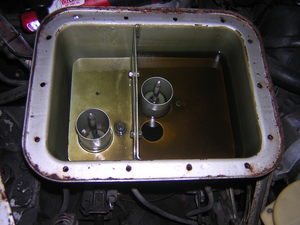
10-Remove the four nuts holding the two baffle plates
Each go with a washerTools: 9mm open spanner
11-Gently lift the plates and the sensor "chimneys"
The two chimneys will come lifting the little plungers that sit inside the "chimneys".Take notice of how the plungers are fitted (the rubber bit is the lower part).Remove remaining liquid that sits under the plates
12-Remove the mesh filters
Tools: 27mm deep socket
13-Mesh filter removed
They are often collapsed. Check for mesh condition.
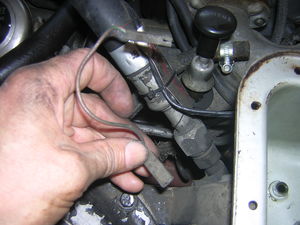
14-Key to the hoses and lines
(1) low pressure hoses (2) high pressure 10mm (3) high pressure 13mm easily accessible
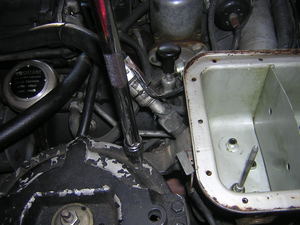
15-Remove the two low pressure hoses
Place a small container under the hoses.Tools: Flat screwdriver
16-Remove the two accessible high pressure pipes
Tools: 13mm open spanner
17-To access the other ports a short open spanner is required
Tools: 10mm short open spanner
18-Disconnect the right pipe first
Its tricky but the key is to appply the spanner exactly on the nut and move vertically.Tools: 10mm short open spanner
19-Disconnect electrical connections to sensor and remove left pipe
The connectors are located on the left side of the reservoir. Maroon / green cable is at the center - Black on the left20-Disconnect left pipe
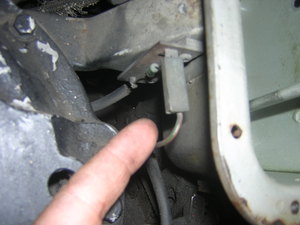
21-Disconnect one more electric cable on the left side
Maroon / green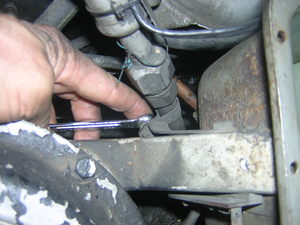
22-Remove the metal bracket securing the AC cable
Tools: 9mm open spanner
23-Remove the nut securing the reservoir to the front left suspension cap
Tools: 11mm - 7/16 in. socket with extension
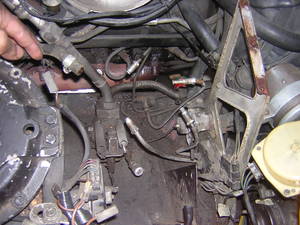
24-Carefully disengage the HP lines from their ports and lift the reservoir
Blank off pipes.Additionnal operations on the reservoir
Do so if you wish to prepare the reservoir for a replating for example.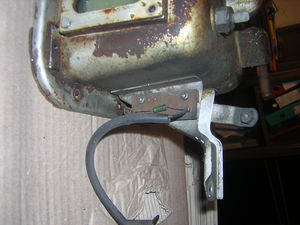
25-Remove plate holding the resistor
Note black cable soldered to the lower endTools: Philips screwdriver
26-Remove plate (2)
Note black cable broke at the solder. Will have to resolder it.Tools: Philips screwdriver

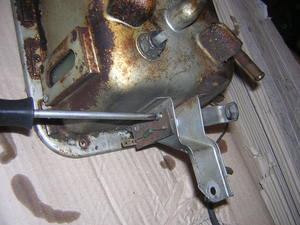
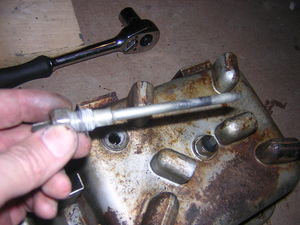
27-Last metal "leg" to remove from the reservoir
Tools: 11 mm - 7/16 in. open spanner
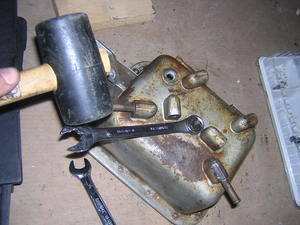
28-Plunger poles removal
2 poles have to be removed. Use penetrating oil. Delicately unlock with rubber hammerTools: 16mm ring spanner
29-Plunger poles removed
Sight glass removal
The sight glasses are held in place with 4 tiny torx setscrews. (to be continued)
