every 6.000 miles, 3000. miles if regular use in town trafic
warm engine (Hb p63)
always change oil along with oil filter
How to :
Getting
prepared
You'll need :
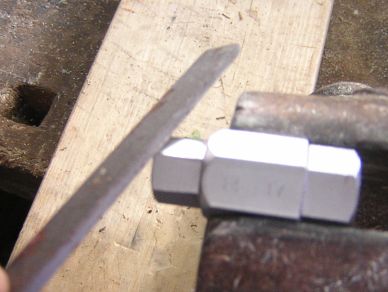
car ramps; 8 litres oil pan; drain tap adapter RR tool or 14mm adapter
filed down to 13'5mm (pic 1); breaker bar; a 22 mm socket for the
filter; empty oil containers; torque wrench.
It is good also to have :
chemical gloves; an o-ring pick; a hammer and a piece of wood; an oil
seringue; lots of newspaper
1. Drain
the engine sump
Warm the engine
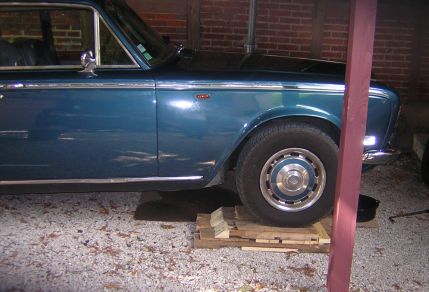
Put car on a ramp (pic 2). Be aware that ideally the car should
be on level in order to perfectly empty the sump. So avoid too steep a
ramp.
Open oil filler located in the bonnet
Place a container (7-8 litres) under the drain plug
Remove the drain plug with the adapter tool or the one you have made (see above).
You may need a breaker bar. But do gently because the pan is made of
thin aluminium.
Slowly unscrew the tap, use chemical gloves : hot oil.
Lets oil completely drain into pan (pics 3 to 7).
It is an occasion to check that your oil level quick test button
operates properly (pic 7b). Push button : on the "fuel" gauge the white
indicatro should not move.
Check condition of the washer and replace if necessary (pic 8)
2.
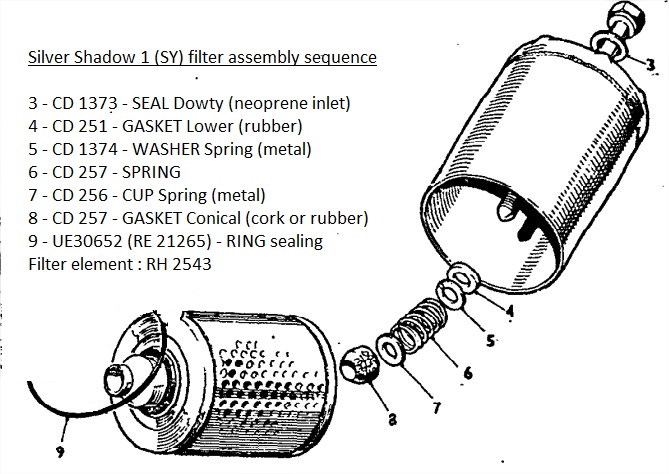
Replacing the oil filter
Support filter by hand and unscrew the setscrew at the bottom of the
filter (pic 10)
Rem (from book by Waples) : "the
bolt has fine threads so it will take quite a few turns to remove
completely".
Carefully hold the filter
with the setscrew in place while unscrewing for at least three
reasons :
- holding upright you will avoid spilling oil,
- you will avoid damaging the threads by hitting them against against
some metal part when the axis detaches from the engine
- you will be able to slowly detach and read the sub-assembly of seals,
washers, spring that are inside the filter housing.
Be sure that the setscrew is totally free before trying to pull out the
filter housing.
Even in this case the filter housing may be stuck in the little recess
where it mates the engine : use a little hammer and a piece of wood and
gently tap it all
around / twist it.
(Waples again : )
"Using a o-ring pick tool, remove the mating rubber sealing from the
recess where the filter housing mates to the engine.
Be careful not to scratch the aluminium.
Disassemble all of the items contained in the filter housing (pic 14).
REM : as it is very easy to make a mistake in the correct assembly
sequence of these items, please read here for further informations.
Clean the inside of the housing with a lint-free rag and reassemble the
oil filter using the items found in the kit (pic 13).
Make certain that the filter housing lip and the recess for the sealing
ring are clean.
Lubricate the new sealing ring with clean oil and
and install it all its way into the recess (pic 15).
Refill half of the bowl with clean oil
Holding the renewed filter assembly, carefully turn the retaining bolt
clockwise a few turns to avoid stripping (french : foirer) the threads.
Once it is engaged sufficiently, push the housing into the sealing ring
recess.
Tighten the bolt with the other hand while holding the housing
firmly in the recess. The required torque tightening figure as mentioned in the Workshop Manual is 10 to 12 lb/ft or 1,4 to 1,6 kg/m
Be careful not to foul the seal."
3.Refilling
with new oil
Pour a little new oil through oil filler and let it drop through the
drain plug (in order to evacuate remaining wasted oil)
Fit drain plug and new washer if necessary
Fill engine with 3/4 of the total required quantity (about 5 litres)
Wait one minute
Start engine and let it run until extinction the oil pressure light
Add remainging oil little by little until it reaches the right level on
the gauge
Fit the filler cap.
4. Extra :
Fitting a Quick Valve drain plug
Quick Valve is a permanent drain plug (valve) which should make further
drain easier / cleaner. It allows you to drain the sump by just opening
a tap and directing dirty oil to a container using a long rubber hose
(part of the kit). I've decided to test it. Read
more about it here.
See pictures 17 to 19.
Refered
pictures
Pic 1 : filing down a drain plug
adapter from 14 to 13,5mm
Pic
2 : using medium size home made ramps
Pic 3 : adpater in place
Pic 4 : breaker bar in place (here with
a 19mm socket)
Pic 5 :
slowly unscrew with chemical gloves
Pic 6 : hot oil draining
Pic 7 :
8 litres pan almost full.
Pic 7b : testing the oil level tester with empty pan.
Pic 8 :
oil drain plug and its washer (good condition here)
Pic 9 : oil filter seen from under the car. 22 mm - 7/8in bolt
Pic 10 : use a 22mm / 7/8 socket to unscrew
the bolt
Pic 11 : unmounted oil filter
Pic 12 :
filter and rubber seal seen from top
Pic 13 : cleaning the housing with a lint-free rag
Pic
14 : seals, washers, spring inside the housing (see below for correct
sequence)
Pic 15 : lubricating filter housing mating
seal before assembly
Pic
16 : seal in its recess
Pic 17 : left original drain plug and washer, right Quick Valve and washer
Note that : on the picture the item#7 does look like a plain gasket :
it is not. It may have been unproperly changed for a gasket on your
filter (see Tee One Topic article).
Item #4 is a rubber element whose inside diameter appears to be
slightly smaller then the one of the axis to make it fit closely.
More infos/tips gathered here
Condensation in engine
Six months is more than long enough to keep the oil, 3 months is
better. Miles do not mean all that much on a car that gets little or
short driving. Condensation collects in an engine and short infrequent
trips will not heat the engine enough to get the water out.
Always change filter
I would NEVER recommend changing only the oil and not the filter. If
for no other reason you are leaving maybe a quart of dirty old oil in
the filter that contaminates your fresh oil.
The Sump Plug Adaptor is often missing in
the tool kit. Here is what I found in RR Forum : "Quote:
13mm would be the closest size you'll find in metric. A 14-mm Allen
wrench is a tiny bit too large and 13 mm just a tiny bit too small.
Some have purchased a 14-mm and then ground it down a smidgen.
You might want to consider buying a Quick
Oil Drain Valve
so you'll never have to take the plug out again. The FG-5 or FG-5N
sizes (The 'N' version has a nipple on the end of the valve) are the
ones for Rolls-Royce and Bentley motorcars from the Cloud/S period up
through the SZ series cars.
2015 - Feedback&comments are welcome at jostjc - at - Gmail dot com
 Home |
  Links&Readings |
Browse by Subject (alphabetical) |
Maintenance Projects
Links&Readings |
Browse by Subject (alphabetical) |
Maintenance Projects
 Pic
2 : using medium size home made ramps
Pic
2 : using medium size home made ramps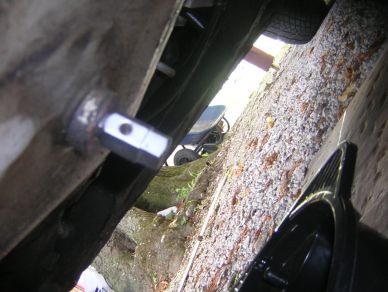 Pic 3 : adpater in place
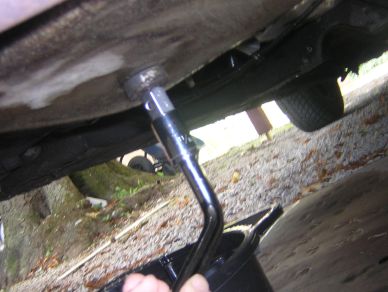 Pic 4 : breaker bar in place (here with
a 19mm socket)
Pic 4 : breaker bar in place (here with
a 19mm socket)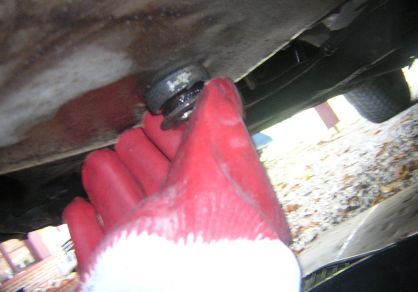 Pic 5 :
slowly unscrew with chemical gloves
Pic 5 :
slowly unscrew with chemical gloves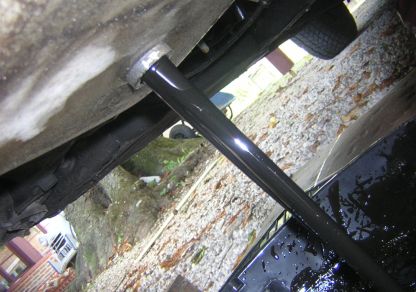 Pic 6 : hot oil draining
 Pic 7 :
8 litres pan almost full.
Pic 7 :
8 litres pan almost full.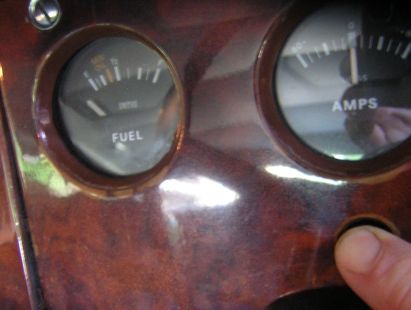 Pic 7b : testing the oil level tester with empty pan.
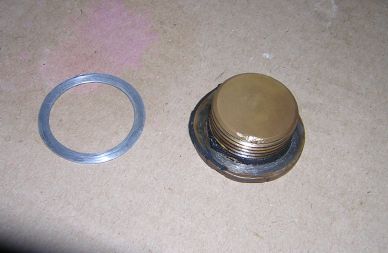 Pic 8 :
oil drain plug and its washer (good condition here)
Pic 8 :
oil drain plug and its washer (good condition here)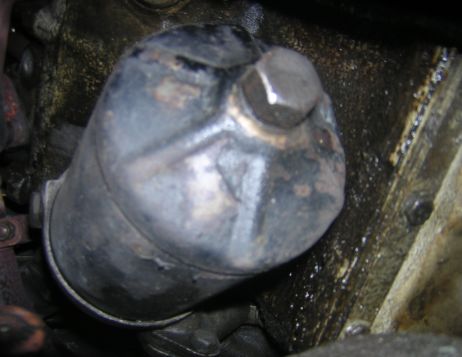 Pic 9 : oil filter seen from under the car. 22 mm - 7/8in bolt
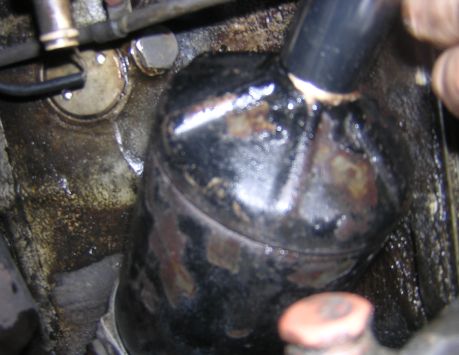 Pic 10 : use a 22mm / 7/8 socket to unscrew
the bolt
Pic 10 : use a 22mm / 7/8 socket to unscrew
the bolt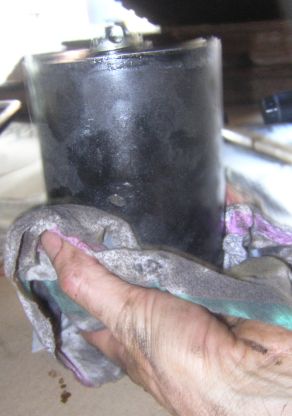 Pic 11 : unmounted oil filter
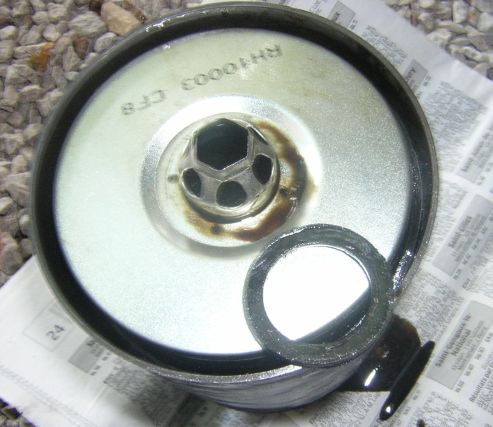 Pic 12 :
filter and rubber seal seen from top
Pic 12 :
filter and rubber seal seen from top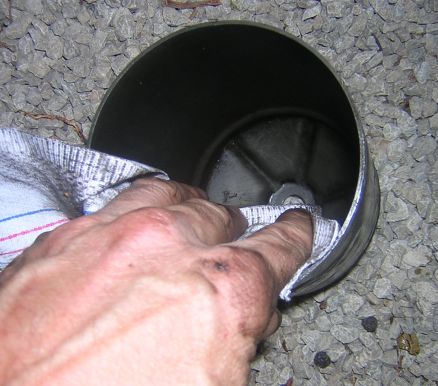 Pic 13 : cleaning the housing with a lint-free rag
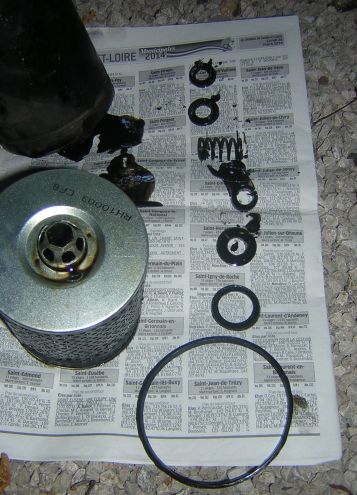 Pic
14 : seals, washers, spring inside the housing (see below for correct
sequence)
Pic
14 : seals, washers, spring inside the housing (see below for correct
sequence)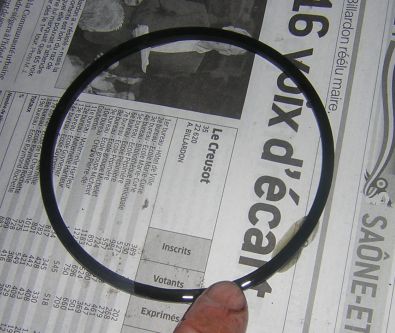 Pic 15 : lubricating filter housing mating
seal before assembly
Pic 15 : lubricating filter housing mating
seal before assembly Pic
16 : seal in its recess
Pic
16 : seal in its recess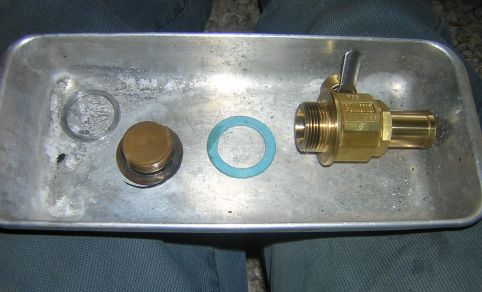 Pic 17 : left original drain plug and washer, right Quick Valve and washer
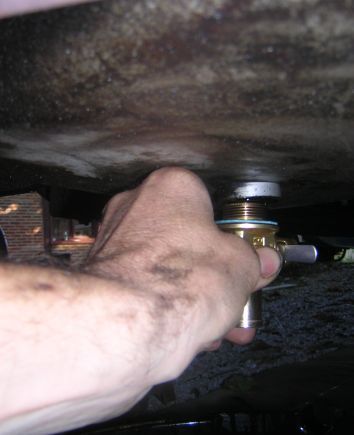 Pic 18 : fitting the QV
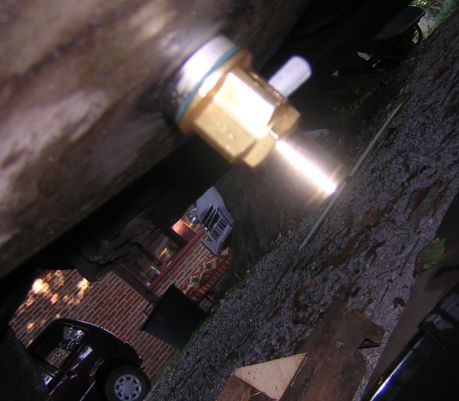 Pic 19 : QV in place