
Electrically operated seats : check into switches for bad contacts
Seats not or partially responding to the switches is a common issue and unless the motor or the clutches are out of order one should check for bad contacts at the end of the switches contacting blades.
The cleaning involves a removal of both switches.
0-Remove ashtray cover
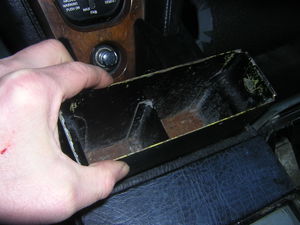
1-Remove the ashtray box
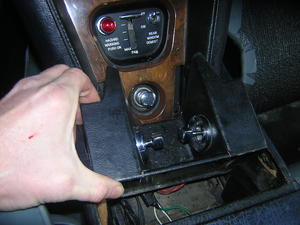
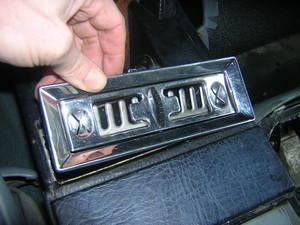
2-Ease out and pull out the switches pannel
Be careful because the wirings are plugged and not that long.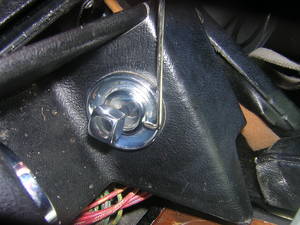
3-Remove the chrome rings
The inner ring has two tiny holes on its sides and the angle is difficult. Use a special tool or a 'hook' for removal and unscrew the ring.Tools: Ring removal tool

4-Mark and remove the wires
The central nut is provided with a dented washer. Note a remounting order so that you will avoid twisting the wires. Nuts are 6BA / 5mm.It's a good idea to spread a cloth under the motors in order to collect a screw , washer or nut, would it fall.
It's also worth noting how the wires are set (which one comes under which) in order to avoid torsion at the remount (Believe me..)
Tools: Flat screwdriver
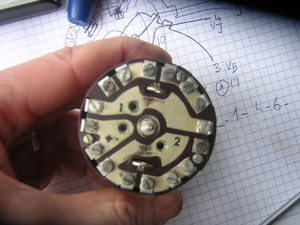
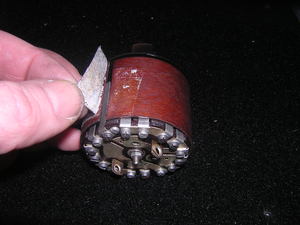
5-Electrically operated seats switch removed
6-Remove the paxolin cover from the switch by peeling off the sticky tape.
"Paxolin (SRBP) is a phenolic paper laminate offering good mechanical and electrical properties in low voltage applications. This material is strong, rigid and economical, and it is ideal in applications such as terminal boards, mounting plates, busbar supports and cable supports."(src : http://www.birchvalley.co.uk/)Before removing the blades
You can now either locate the faulty contacts with a continuity check (see below) or remove every blade of the switch for a cleaning.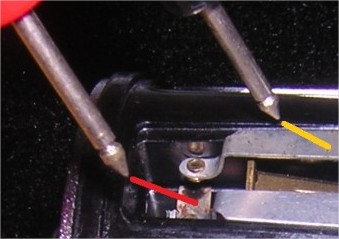
7-Perform a continuity test
When the switch knob is activated it makes a little brass plate (seen here at the bottom of the picture, red mark) rise and contact which the end of the fixed metal blades (seen at top, yellow mark).To see which blades are not in contact with the plate, use a multimeter, set it to Ohm, activate the knob in order to move the plate at the precise place where you perform the test, then apply the multimeter probes where marked on the picture. Do not apply pressure on the probes. A correct contact will show 0 or very close to 0. If the multimeter reads 1 then the contact is not made.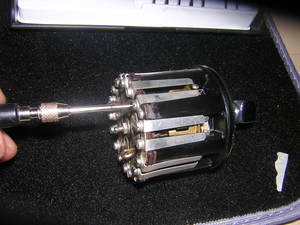
8-Removing a contact blade
The blades are secured with a little setscrew and a tiny washer. Just use a small flat screwdriver. Avoid pressing the blades with your hand when unscrewing.Tools: Flat screwdriver
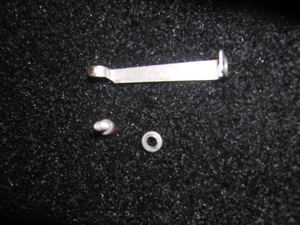
9-Removed contact blade with setscrew and washer
The contact point is at the left, facing up.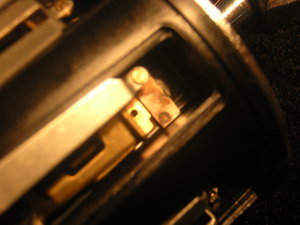
10-Selector with one of the two blades removed showing corroded contact
On this picture you clearly see the mobile brass plate with a corroded / dirty contact point lying just under the missing blade's contact point. This *can* sometimes be the cause of a non operating switch.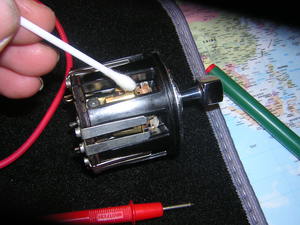
11-Remove both blades over the mobile contact late and clean the plate and the blades
Use contact cleaner and a Q-tip.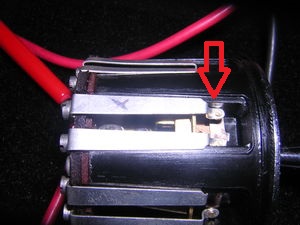
12-Sometimes you'll have to bend a blade to restore contact
This is what I could read in an article. If after a contact cleaning there is still no continuity, it is possible to slighlty press on the edge of a MOUNTED blade if order to gain a little angle downwards.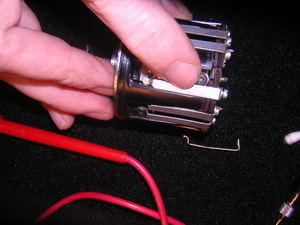
13-When remounting the blades two things must be taken in account
First on each pair there is a left and a right blade. And second, acertain the blades are resting on their full length on the plastic ridge.
